Product & Inventory Management
This guide explains how to effectively add and organize products in your store. We will cover everything from creating your first category to managing complex product variations like different sizes and colors.
Note: You must verify your email and create at least one Category before you can add products.
1. The Products Dashboard
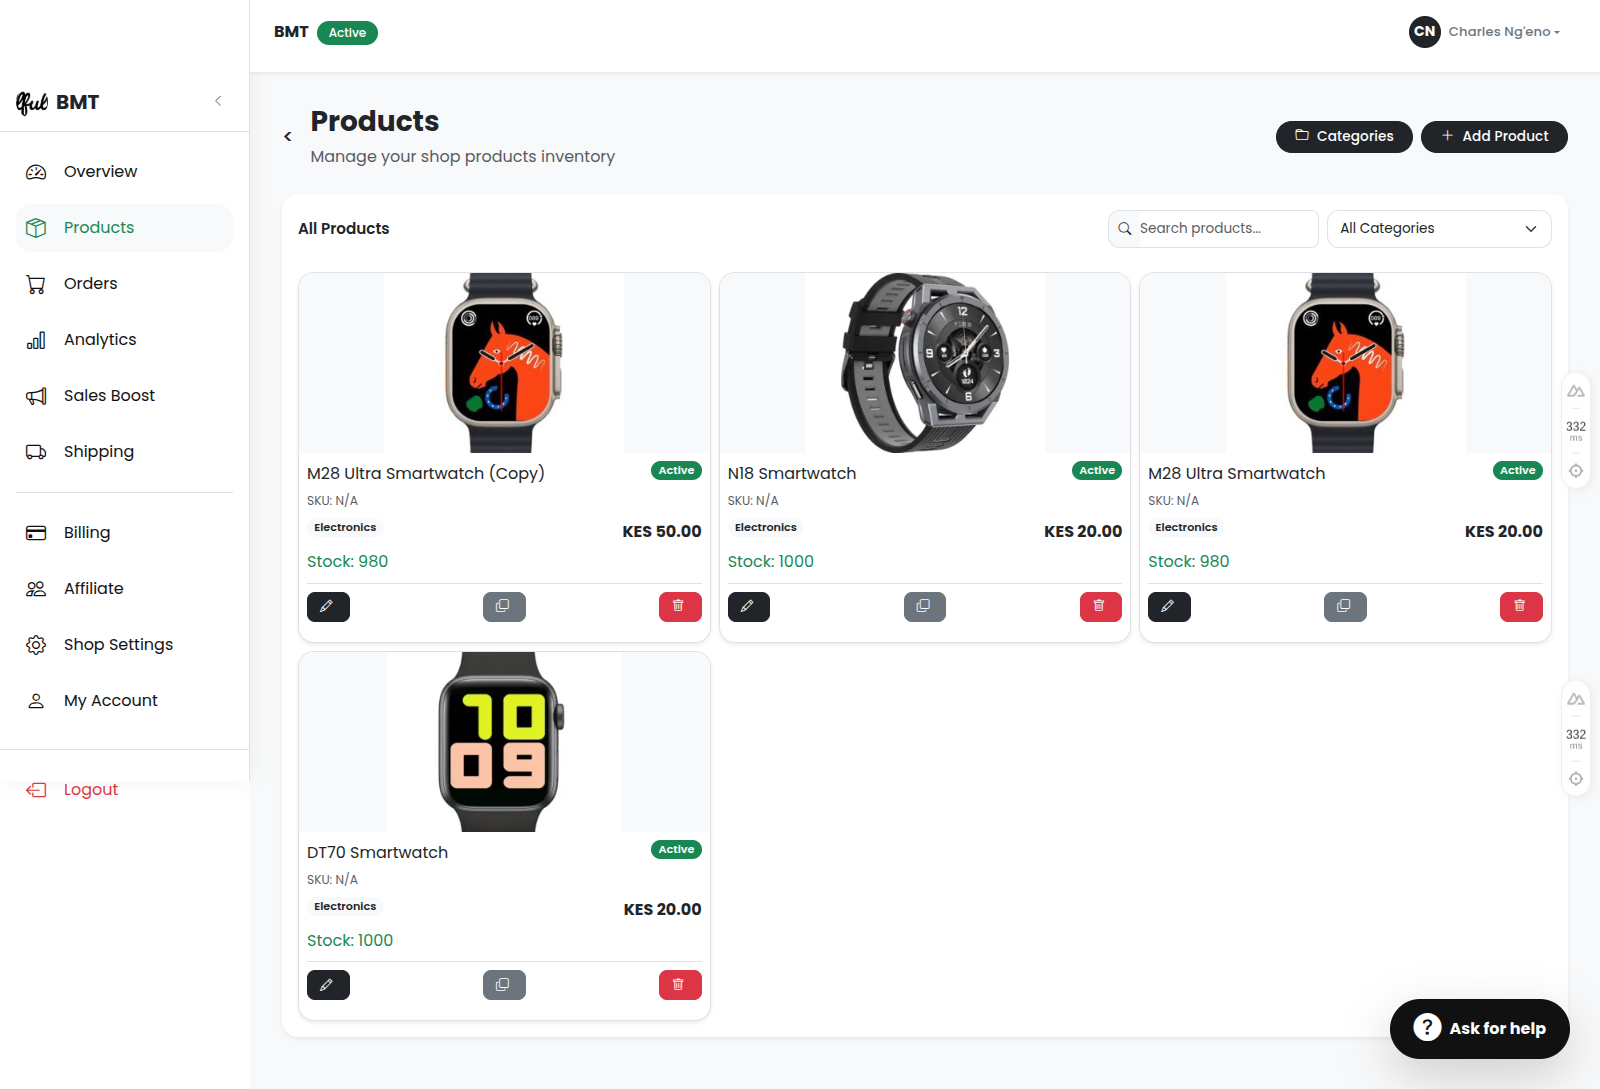
To view your current inventory, open the menu (≡), tap on Products to expand the section, and select All Products. This dashboard shows all your current items, their prices, and stock levels. From here, you can easily filter, search, or add new items.
2. Managing Categories
Categories group similar items together (e.g., "Men's Wear", "Electronics") making it easier for customers to browse your shop. You must create at least one category before adding a product.
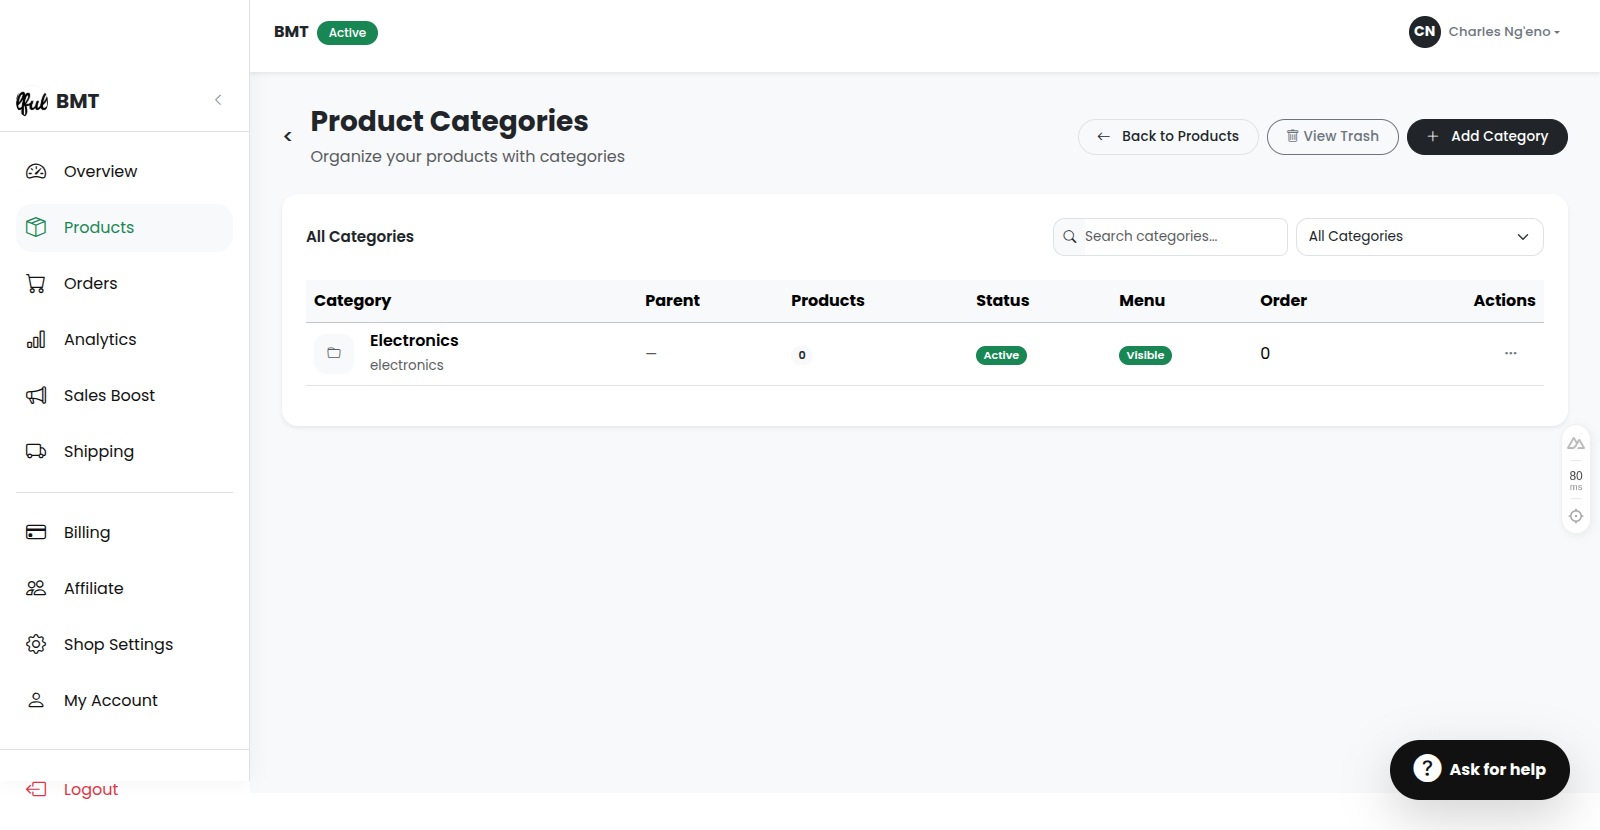
- From the expanded Products menu, select Categories to view your existing groups.
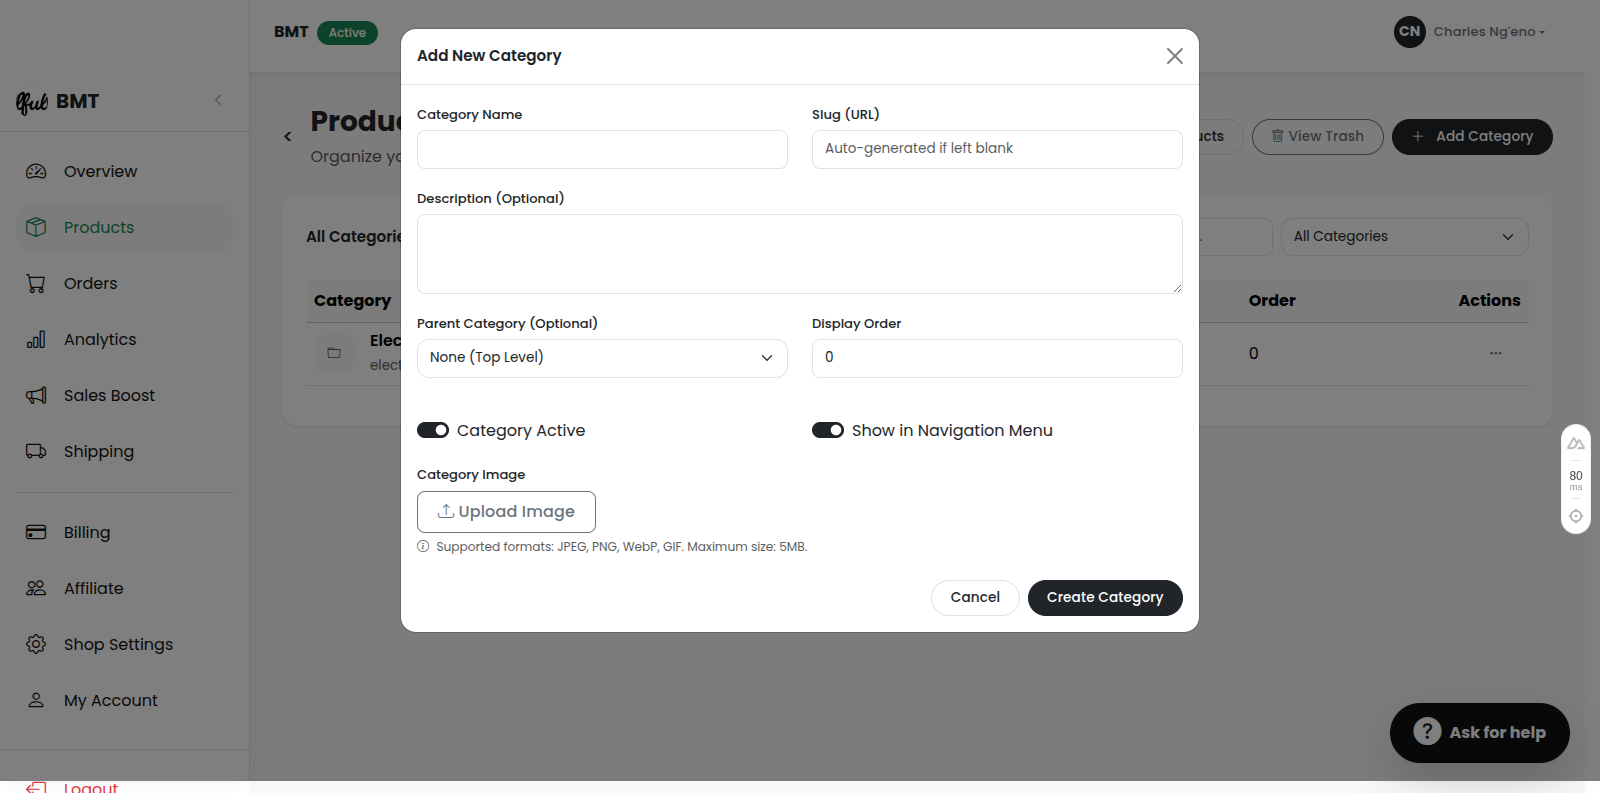
To create a new category, click the Add Category button.
- Category Name (Compulsory): The title of the group (e.g., "Sneakers").
- Parent Category (Optional): Select an existing category if you want to make this a sub-category (e.g., "Sneakers" under "Men's Wear").
- Description (Optional): A brief explanation of what the category contains.
- Category Image (Optional): Upload a representative image for the category.
3. Adding a New Product
To begin adding a new item, you first need to be on the Add Product page. There are two ways to get here:
- Option 1: If you are already on the Products Dashboard, simply click the Add Product button at the top of the page.
- Option 2: From anywhere in the app, open the menu (≡), tap on Products to expand the section, and select Add Product.
Once you are on the page, you will see a comprehensive form with several sections. Here is a breakdown of every single option available:
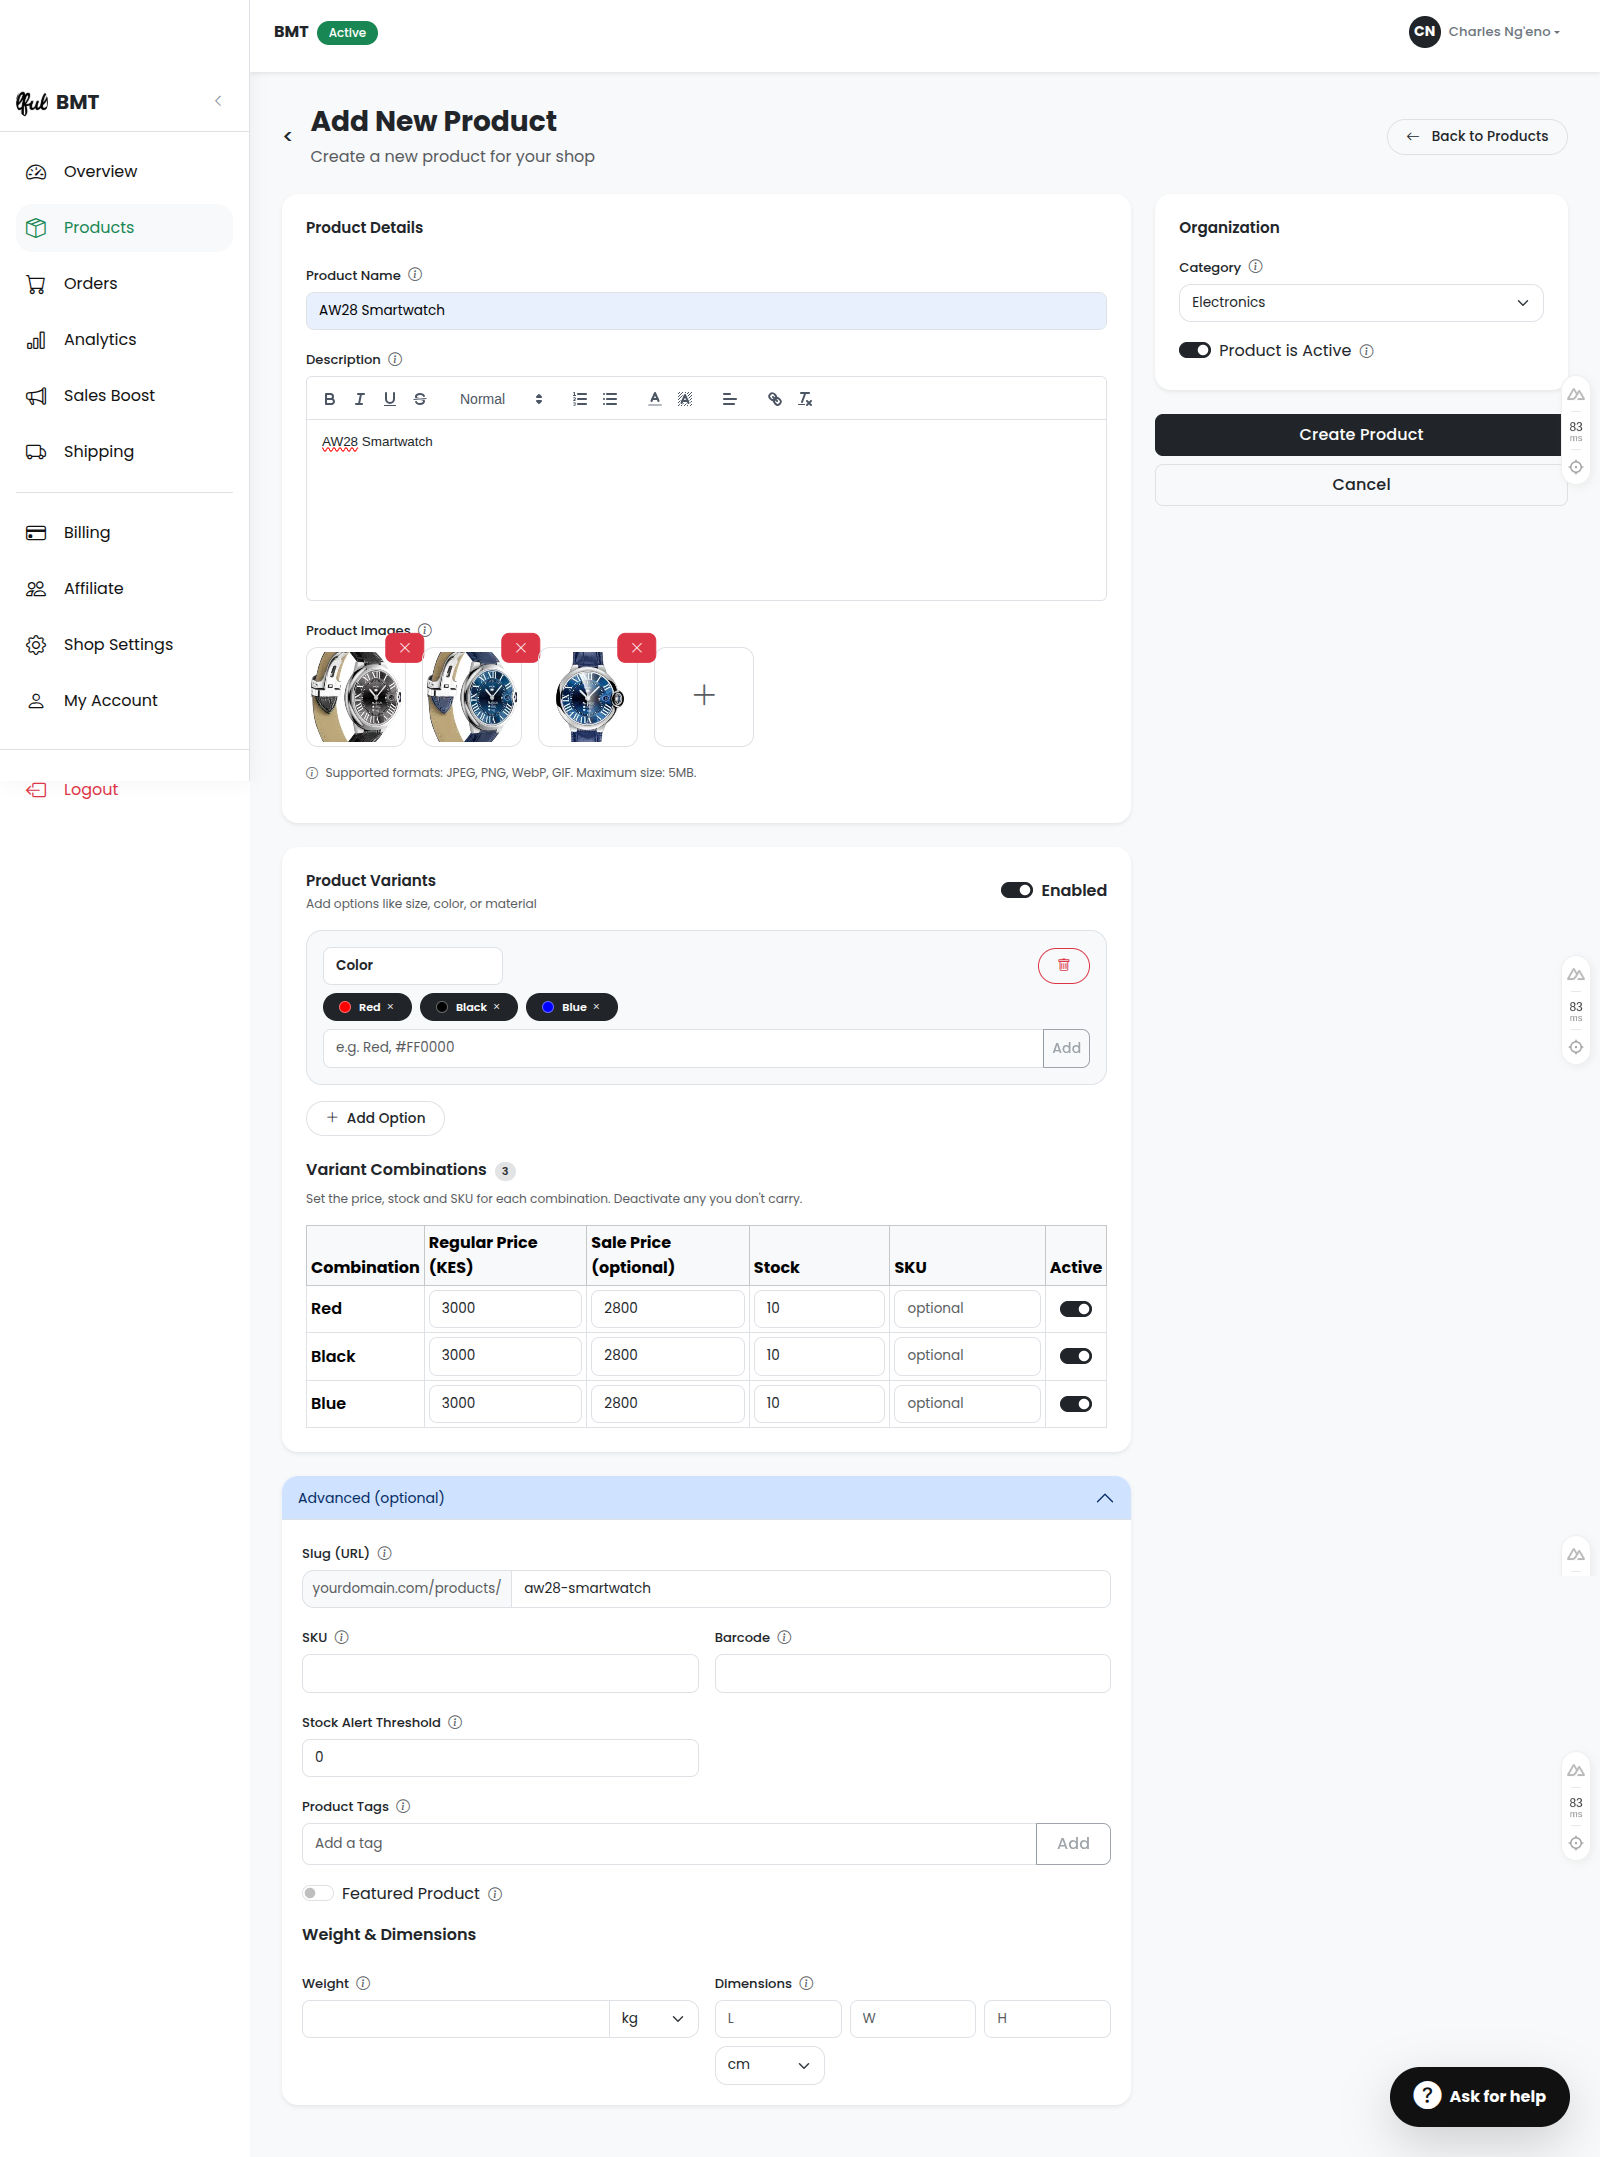
Basic Information
- Product Name (Compulsory): Use a clear, descriptive title.
- Description (Optional): Use the rich-text editor to add formatted text, lists, and links explaining your product's features.
- Images (Compulsory): Upload at least one high-quality image. You can upload multiple images, and the first one will automatically become the main thumbnail.
Simple vs. Variable Products
By default, the system assumes you are adding a Simple Product (an item with no variations). If you are selling an item that comes in different sizes, colors, or materials, you must toggle "Product has variations".
- Without Variations (Simple Product):
- Regular Price (Compulsory): The standard price customers will pay.
- Sale Price (Optional): Enter a discounted price. The regular price will be crossed out on the storefront.
- Quantity (Compulsory): Enter your current stock level.
- With Variations (Variable Product):
- When you toggle variations, you first add the Option Type (e.g., "Size", "Color").
- Then add the specific Values (e.g., "Small, Medium, Large").
- The system will automatically generate a table where you can set a unique Price, Sale Price, and Quantity for each individual variation combination!
Advanced Configuration (Optional)
Click the Advanced accordion to reveal powerful features for store management:
- Slug (URL): Customize the specific link to this product.
- SKU (Stock Keeping Unit): Enter an internal tracking code.
- Barcode: Enter a barcode number (useful for POS scanning).
- Purchase Cost: Track how much you bought the item for to calculate profit margins (this is strictly hidden from customers).
- Stock Alert Threshold: Get a notification when the stock level falls below this specific number.
- Tags: Add comma-separated keywords to help customers search.
- Featured Product: Toggle this to highlight the product in special sections on your storefront.
- Weight & Dimensions: Essential to fill out if you use calculated shipping rates so couriers can determine delivery fees.
Organization & Status
- Category (Compulsory): Assign the product to one of the categories you created earlier in the Category section.
- Status (Compulsory): Toggle "Product is Active" to make it visible. If disabled, it acts as a hidden draft.
- Branch Availability: If you are on a premium plan with multiple physical locations, you can select exactly which branches carry this product.
4. Editing an Existing Product
To make changes to a product later, you need to return to the list of all your items.
- Open the menu (≡), tap on Products to expand the section, and select All Products.
- Scroll through your list to find the item you want to change.
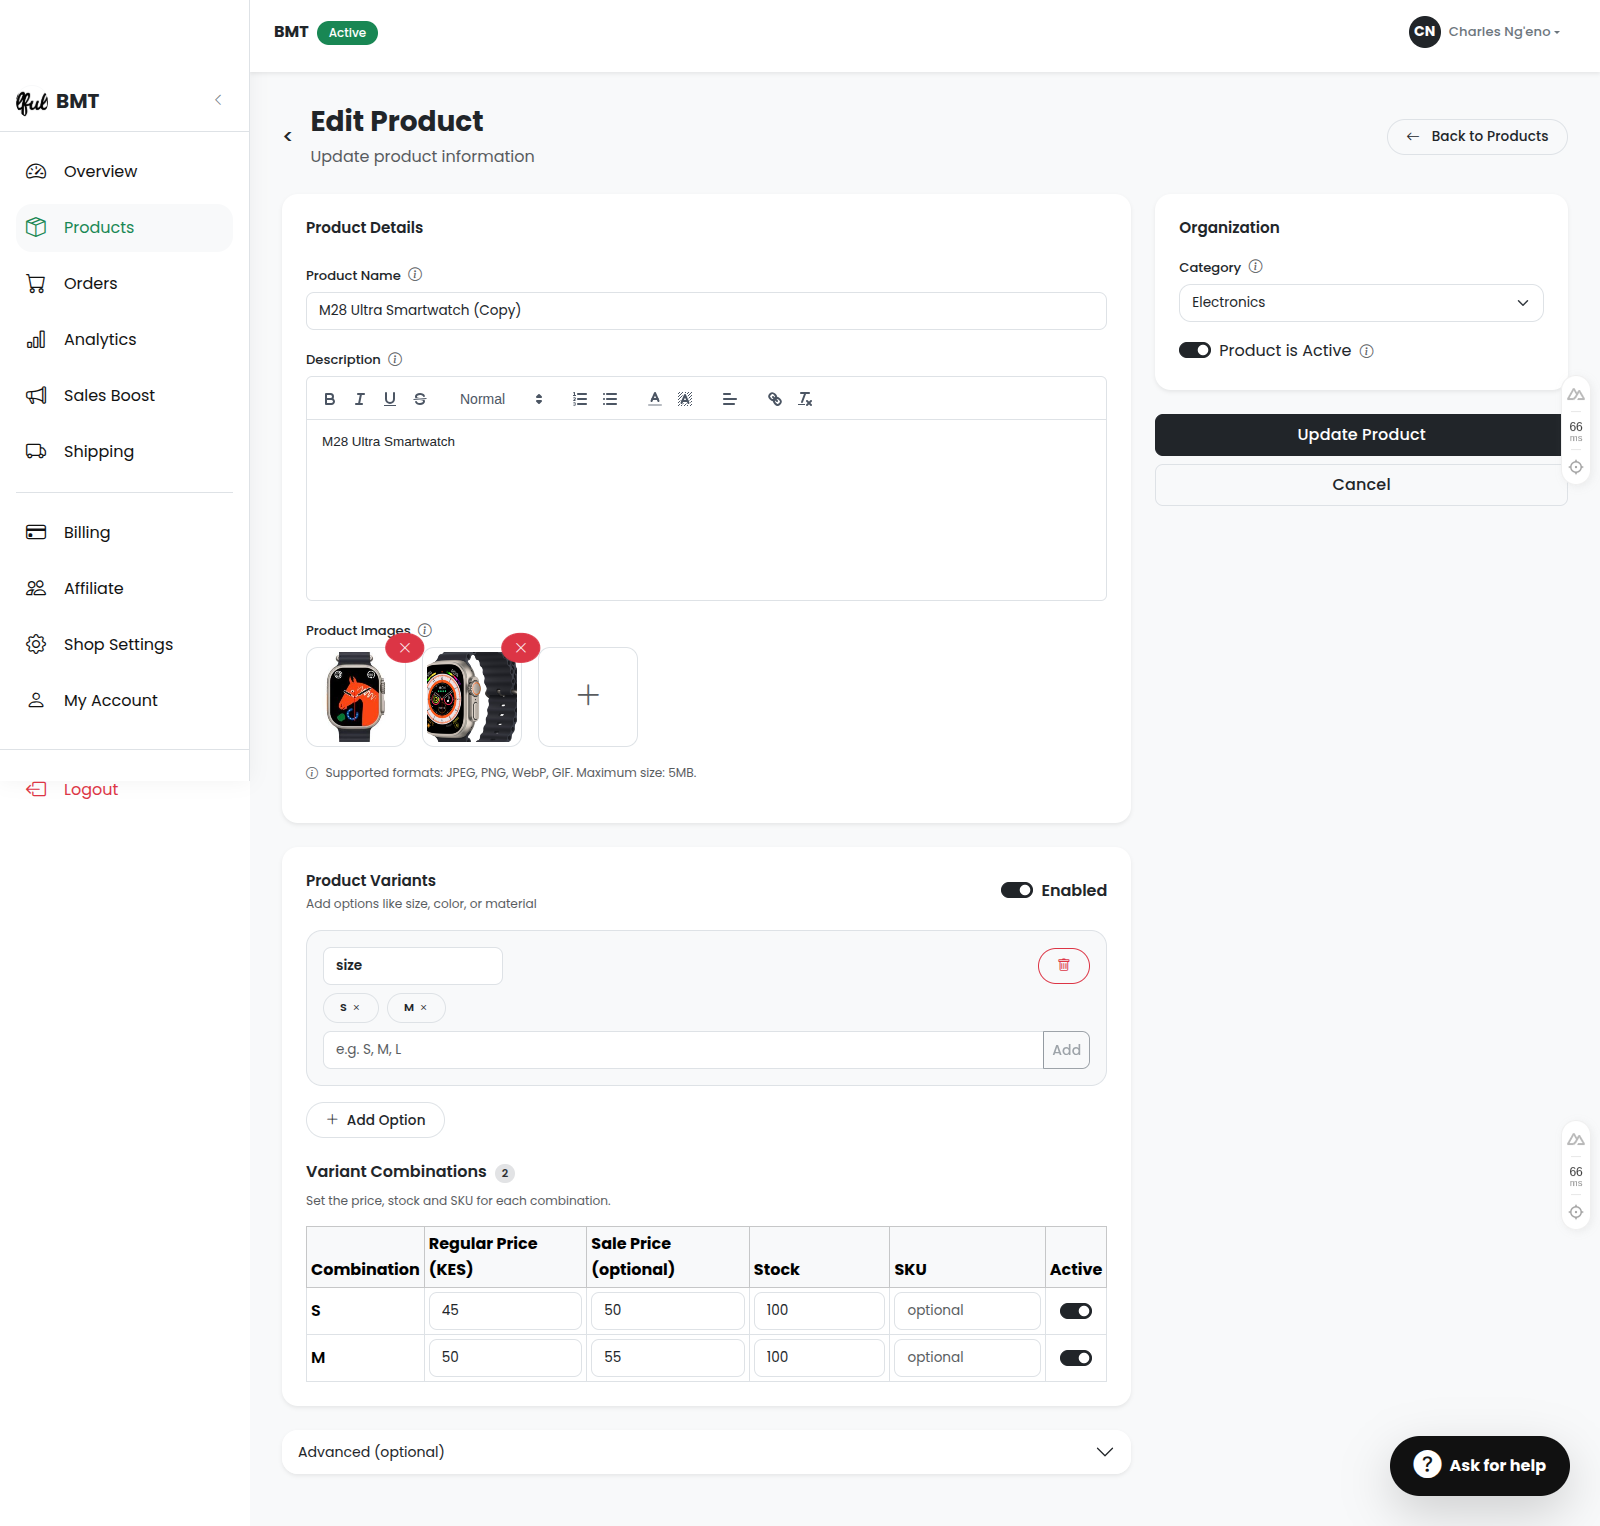
- Click the Edit button (represented by a pencil icon) located on the product's card.
The edit screen looks exactly like the Add Product screen, allowing you to easily update prices, restock quantities, or change images instantly. Don't forget to scroll to the bottom and click "Save Changes"!