Managing Orders
The Orders dashboard gives you a complete overview of all your sales. Efficient order management leads to happy customers and repeat business. Follow this step-by-step guide to process your sales.
1. Accessing the Orders Dashboard
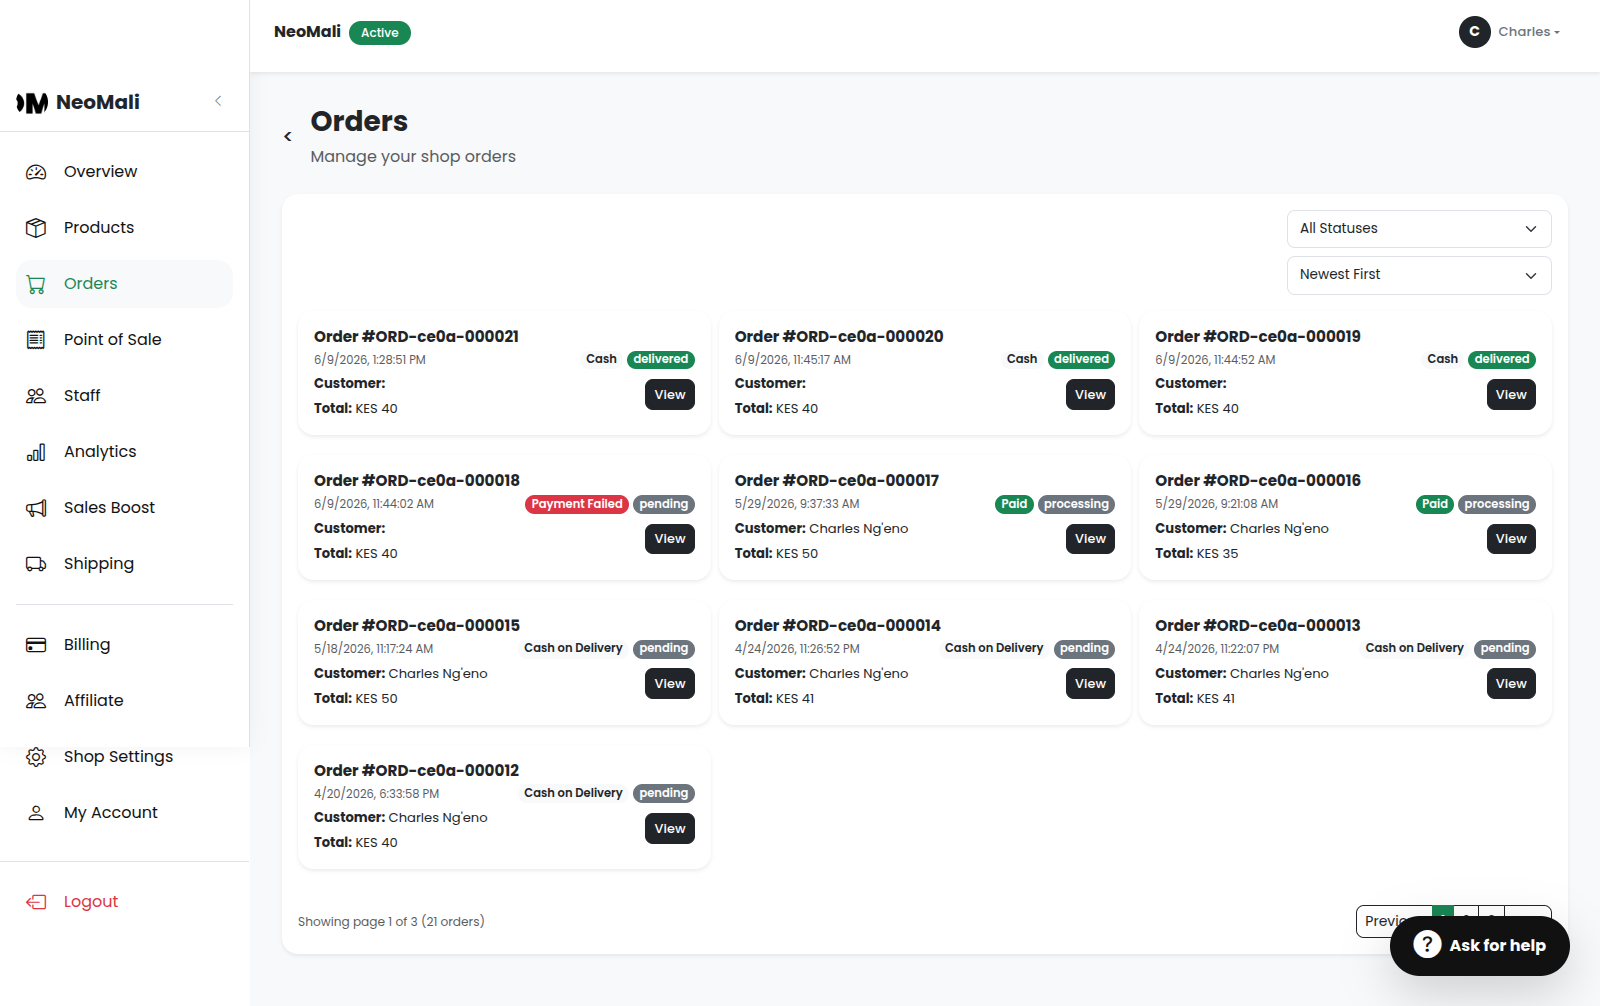
To see your incoming sales, open the menu (≡) and tap on Orders. This takes you to the main Orders dashboard where you can see a list of all your transactions.
- Filtering: At the top of the page, click the Filter by Status dropdown to view only Pending, Shipped, or Cancelled orders.
- Sorting: Use the Sort By dropdown to organize orders by newest/oldest or by total amount.
2. Understanding Order Statuses
Each order appears as a card on the dashboard showing the customer's name, the total amount, and color-coded badges to help you quickly identify its current state.
- Payment Statuses:
- Paid The M-Pesa transaction was successful.
- Pending Payment The customer initiated an M-Pesa prompt but hasn't completed it.
- Payment Failed The transaction was cancelled or declined.
- Cash on Delivery The customer opted to pay upon receiving the item.
- Fulfillment Statuses:
- Pending / Processing The order is new and needs your attention.
- Shipped The order is with the courier or out for delivery.
- Delivered The order is complete!
3. Viewing Specific Order Details
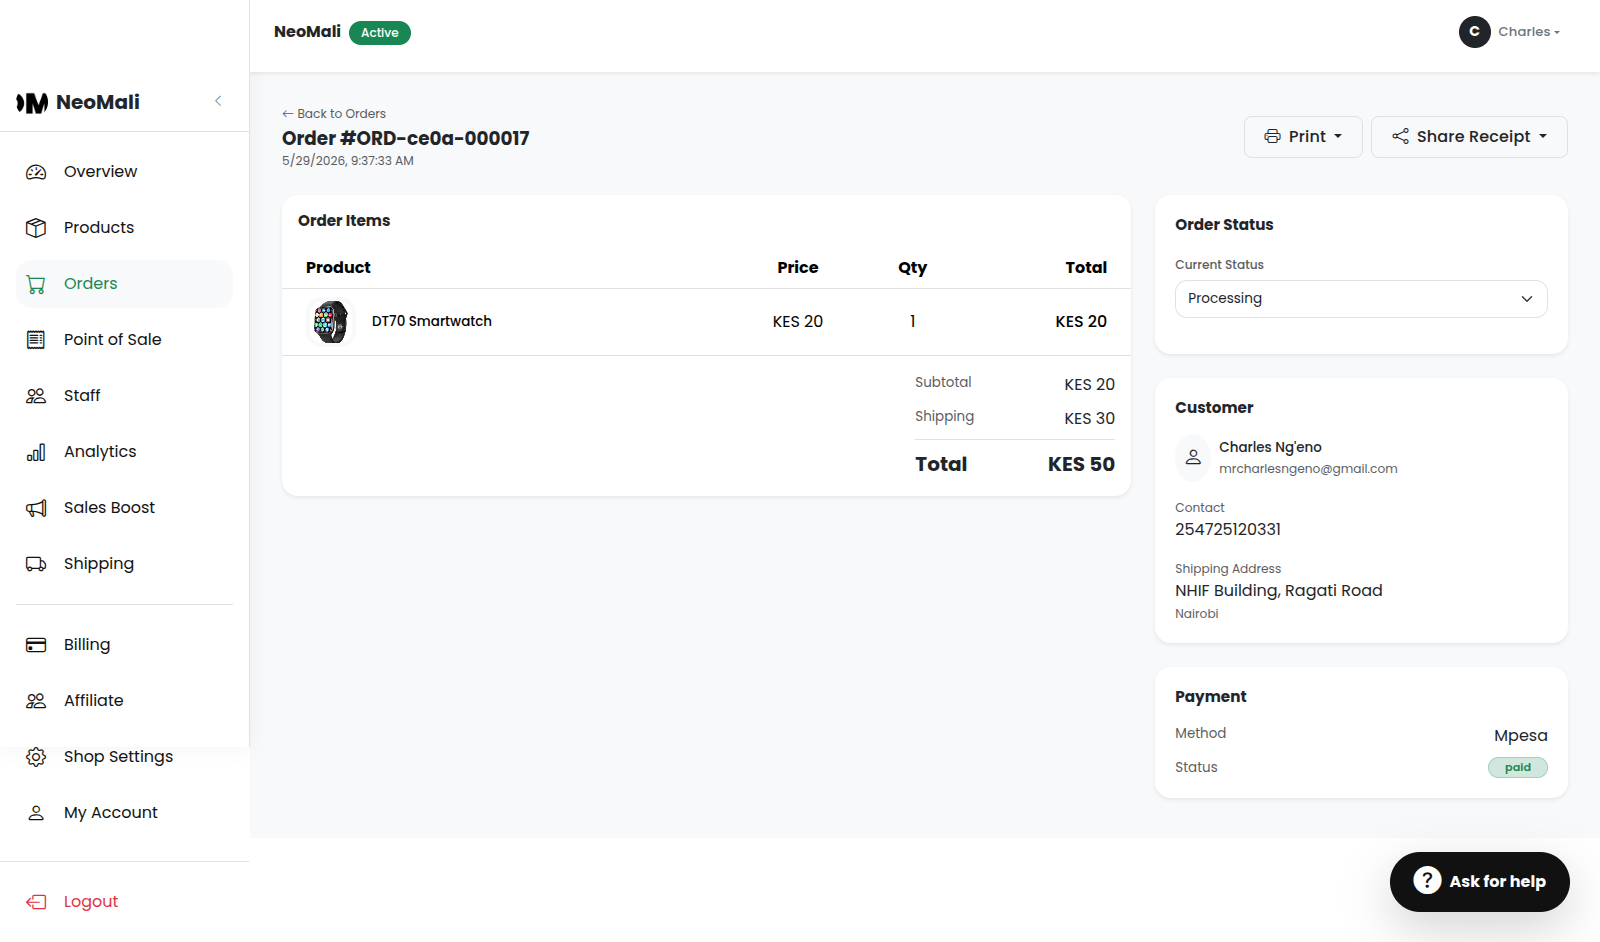
To see the full breakdown of a purchase, click the View button on any specific order card. This will open the dedicated Order Details Page.
On this page, you will find:
- The specific items, variations (like size/color), and quantities purchased.
- The customer's full shipping address, email, and phone number.
- The customer's preferred dispatch time (if selected).
4. Updating the Order Status
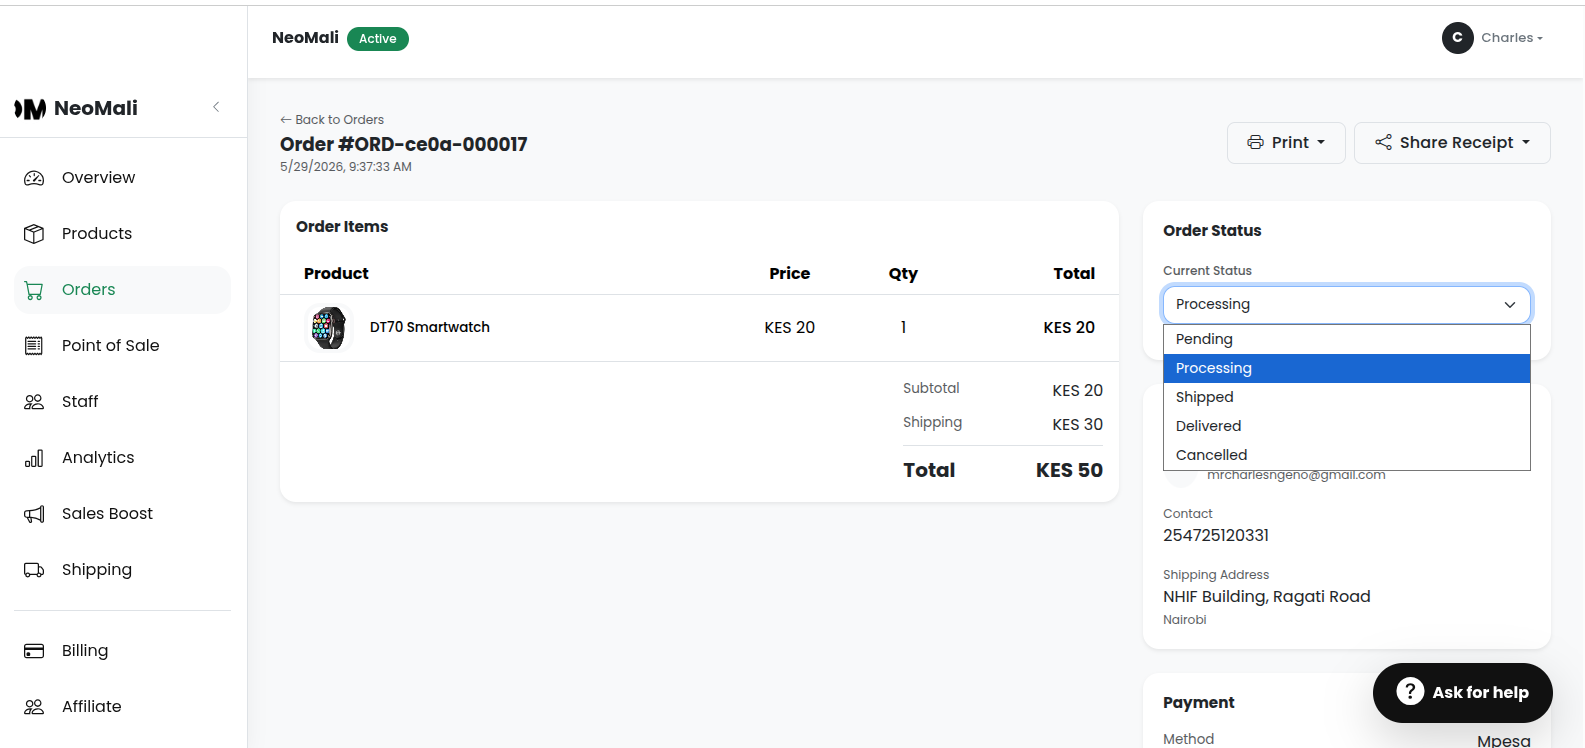
As you process an order (e.g., packing it, handing it to a rider), you must update its status so your shop records are accurate.
- While on the Order Details Page, look for the Fulfillment Status section.
- Click the dropdown menu and select the new status (e.g., change it from "Pending" to "Shipped").
- Click the Update Status button to save the change.
5. Printing Receipts and Shipping Labels
If you need physical copies for your records or to stick onto a delivery package, you can print them directly from the dashboard.
- While on the Order Details Page, locate the action buttons (usually at the top or bottom depending on your screen size).
- Tap the Print Receipt button to generate a customer receipt.
- Tap the Print Shipping Label button to generate a clean label containing the customer's delivery address and phone number, ready to attach to your parcel.
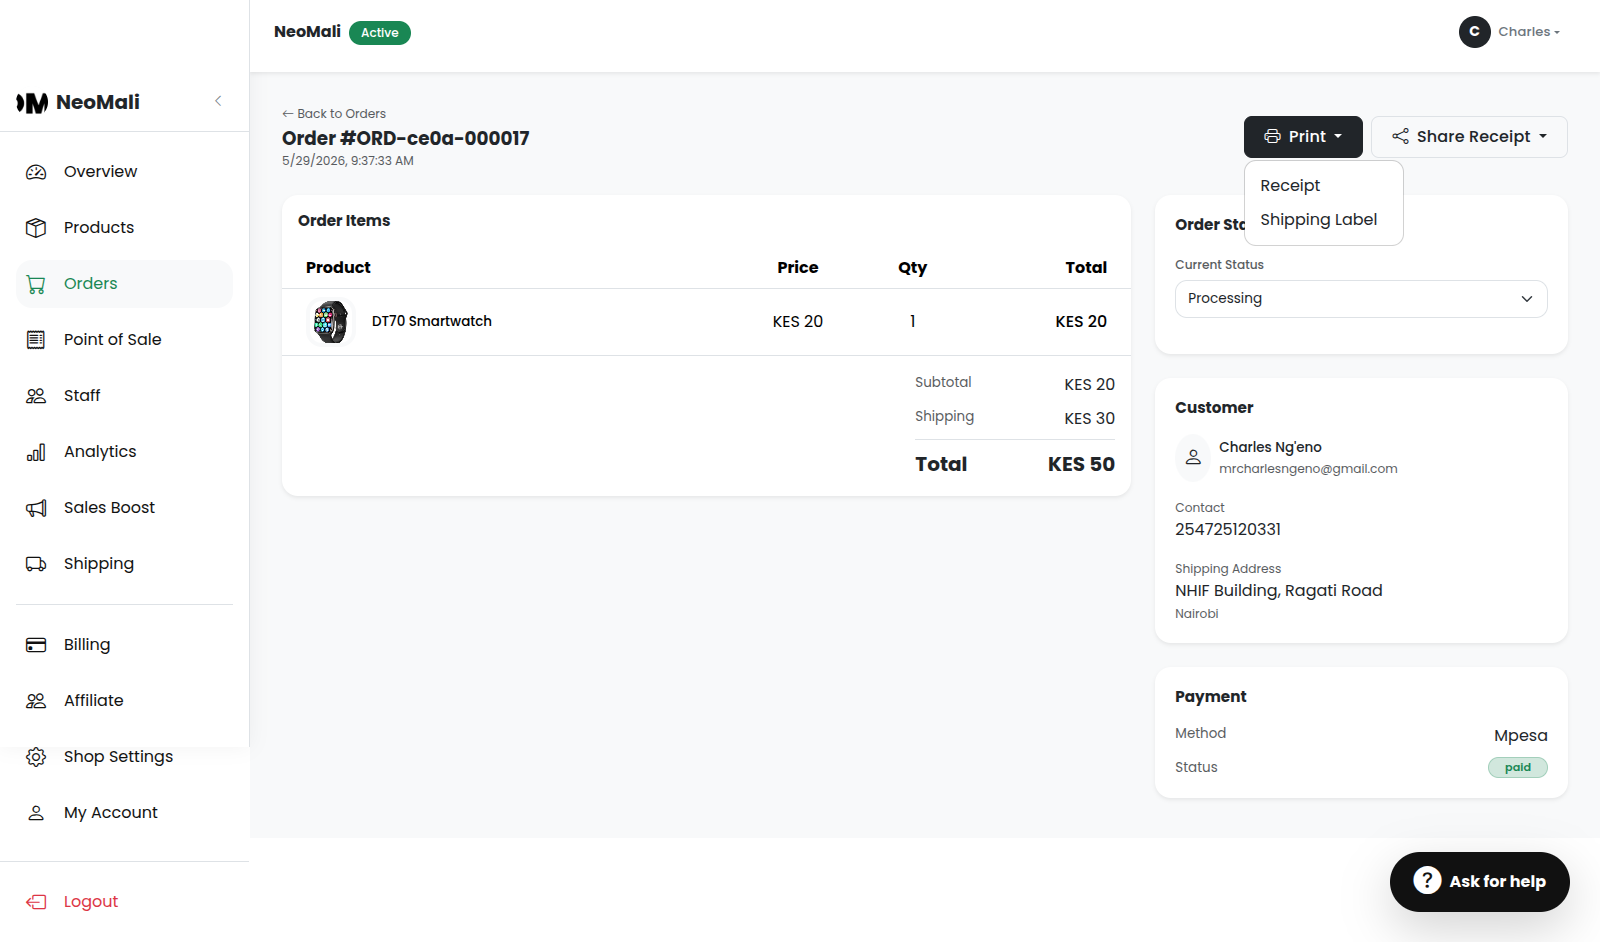
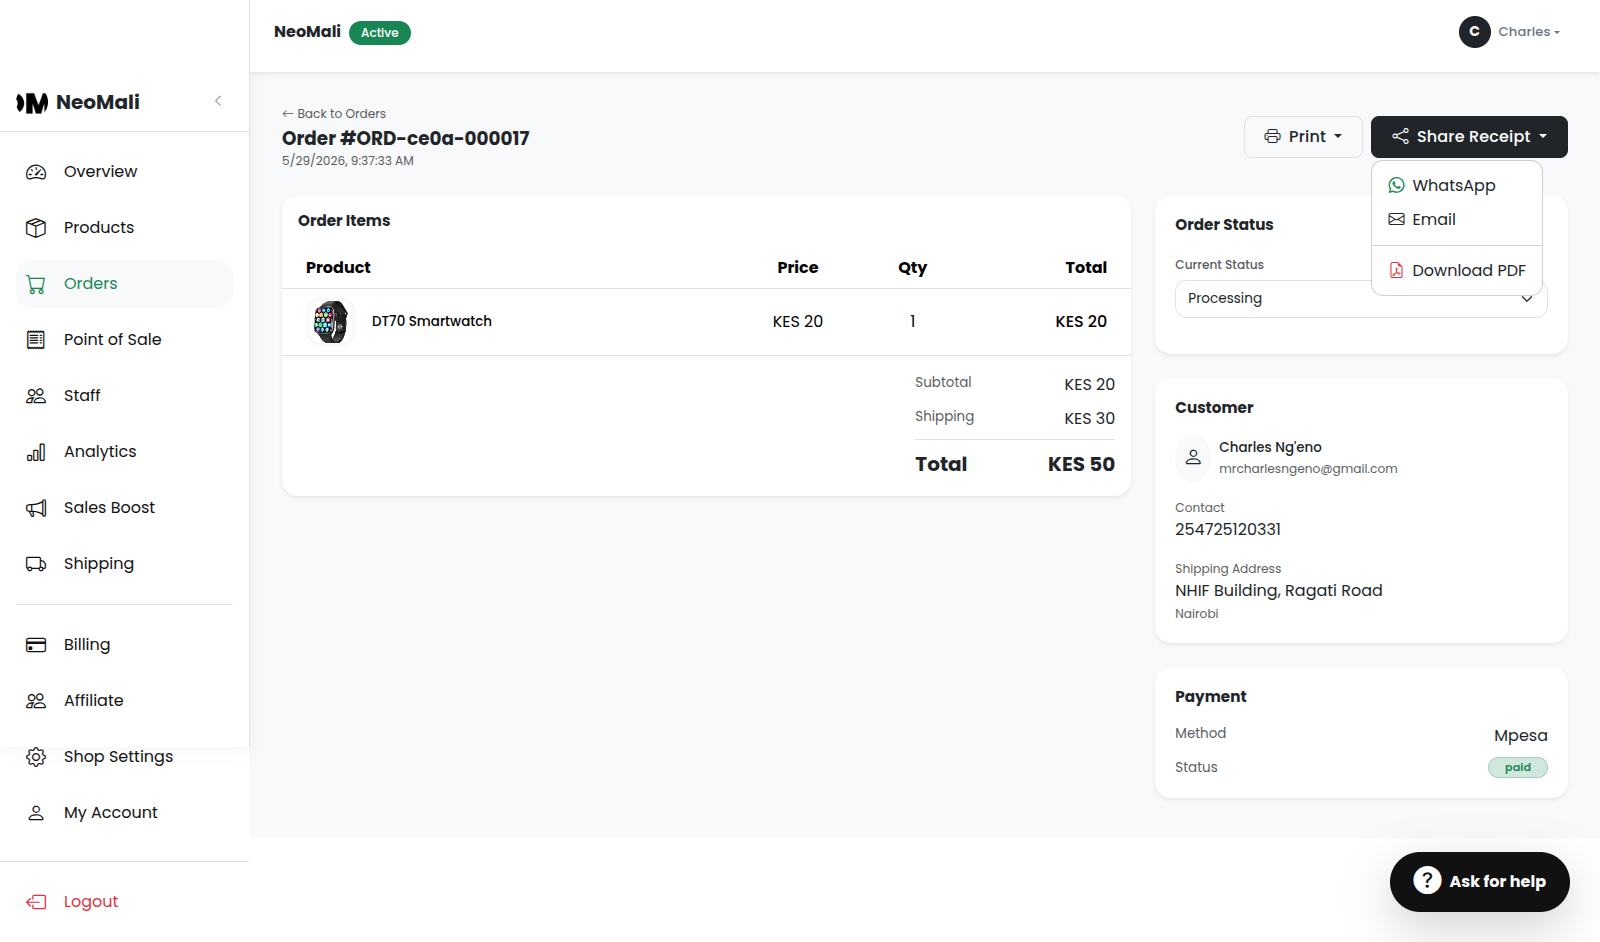
6. Sharing and Downloading Receipts
You can instantly share a digital receipt with your customer to confirm their purchase.
- Tap the Download Receipt button to save a PDF version directly to your phone or computer.
- Alternatively, tap the Share Link or Share button. This will copy a direct web link to the receipt that you can easily paste into a WhatsApp chat or email with the customer.